Most times we encounter some programs and applications on our PC which we would instead use without letting them gain access to the internet as they may alter how the program function or load us with unnecessary updates and redirect us to links when using them. And other times, the programs we wish to use are modded versions or unlocked versions which access to the internet would mean loss of files, game data, settings, or even getting locked out of our accounts.
In this article, I would go through the steps to turn off internet access for your pc programs.
NB: This is for educational purposes only (yada yada yada yktv)
So, let's get to it:
Step 1:
Install your program, you want to make sure that you have completed the download and installation of your program and that you have followed the appropriate steps in installing the program
Step 2:
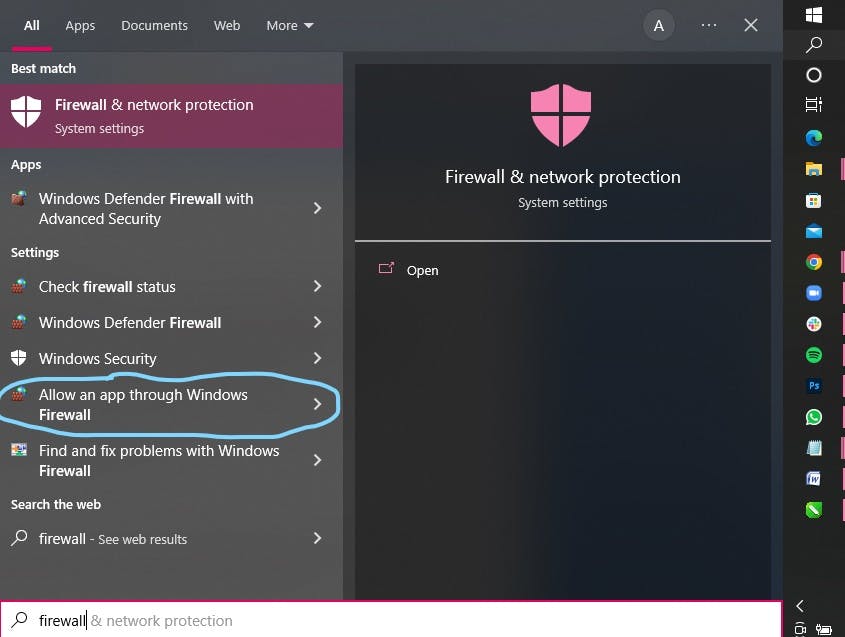
Navigate to your search icon on your taskbar and search ‘firewall’, select ‘Allow an app through firewall’

Step 3:
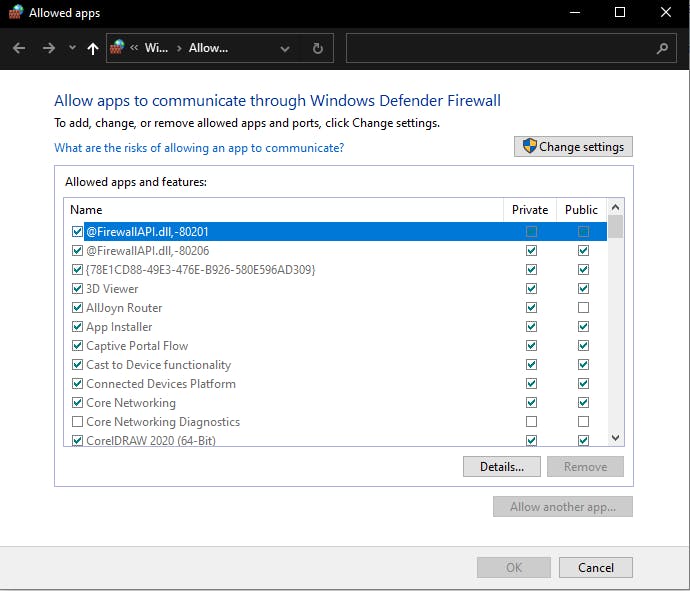
Once opened, a new window pops up for allowed apps, this is where you would find a list of your apps that currently have access to the internet through your firewall, you would find two sections for each app ‘private’ and ‘public’ which represents access to your private and public network respectively.

Step 4:
To be able to make changes to your apps, you would need administrator access, here, you would click on the ‘Change Settings’ button, and that would grant you access and all faded options would become legible and clickable

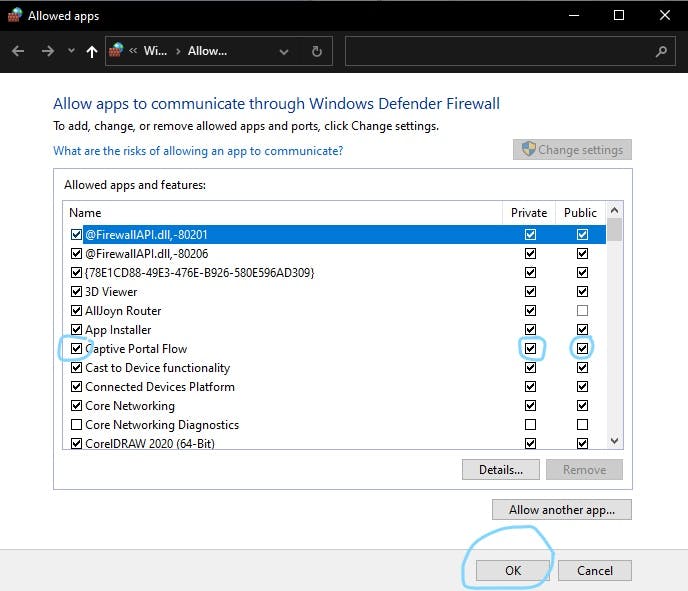
Apps can then be turned off and on in the three marked areas, once done, click ‘OK’ to save changes, and your preferred apps will no longer have access to the internet through your firewall anymore until you turn them back on again.

This can also come in handy when you are on a public network you don’t trust, you can safely turn off access to your apps that can be monitored over the web.

